
Monday, December 17, 2012
En route a un cafécito...
Thursday, December 13, 2012
Shelter Co.
Hello there and happy Thursday! I hope you're all having a wonderful day before the last day of the work week! So, I found out about this awesome company through one of my favorite blogs, and I am SO thrilled to share this awesome find with you!
Let's rewind a few years. It's the summer of 2009 and my sisters and I plan an knock-down-drag out awesome camping trip full of fun and adventure. We had our cooler packed to the brim, full of fruits and veggies and all of the fixings for vegetarian burritos. We packed the stove and all of the plates and utensils. We were clearly preparing for a camping feast! It was so awesome!
 We've got Koya in the car, and everything is packed and ready to go! We set out on our journey...
We arrived to our campsite right after the sun had set...remember that KEY piece of information as I continue on with my storytelling...


Let's rewind a few years. It's the summer of 2009 and my sisters and I plan an knock-down-drag out awesome camping trip full of fun and adventure. We had our cooler packed to the brim, full of fruits and veggies and all of the fixings for vegetarian burritos. We packed the stove and all of the plates and utensils. We were clearly preparing for a camping feast! It was so awesome!
 |
| camping cooler |
 |
| packed VW |
 |
| man's best friend...so stoked to be going camping! |
 |
| through the Columbia River Gorge... |
 |
| all the way to Mt. Hood... |
Note: The pictures above were taken the following day in the bright sunlight!
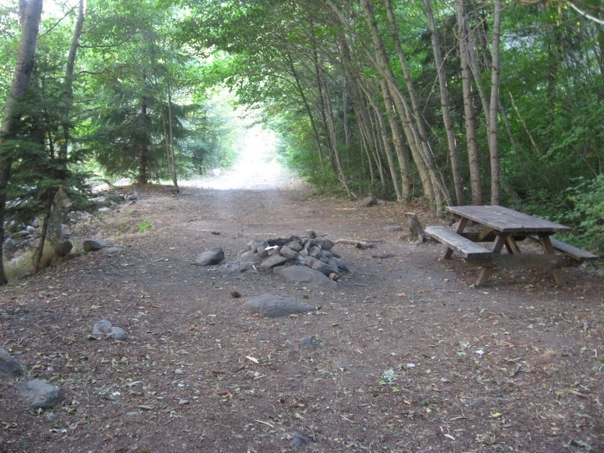
So, we settled into our campsite, pitched our tent, unloaded our belongings and began preparing our dinner. We had a wonderful time enjoying the outdoors and preparing our burritos and marveling at the wonders of mother nature. There was a stream which was adjacent to our campsite and provided some ambient background noise. Koya was going crazy and enjoyed chasing after anything and everything that was in existence in the wild (remember this point, too).
We all are smart campers and had our headlamps so that we could see in the dark. One of my sisters had the important job of cranking the lantern (it's manually powered) so that we could enjoy even more light. She basically just walked around and illuminated the area. She was an absolute trooper. We feasted and stuffed our bellies with delicious vegetarian burritos and then we promptly picked up our ingredients and utensils and put everything away so that we would not attract any unwanted creatures. Nothing like an unwelcome visit from a raccoon to spoil a camping trip (I learned that the hard way back in 2000 when I went camping with the Girl Scouts! Raccoons LOVE Hershey's bars...always remember that, friends.). Anyhoo, after cleaning up, we chatted around the picnic table and before we knew it, Koya began FREAKING out! I don't live with Koya on a daily basis, but something in his bark was totally off and totally different from his typical bark and behavior. He started running around and growling and he would not calm down. Typically, after a few shouts from his momma, he'll settle down, but that certainly wasn't happening that fateful night in August. It was about 10pm at this point and we had survived a solid three hours of camping. We collectively decided that Koya was not going to calm down (after he was barking for 15 minutes straight) and we made the difficult decision to pack up our tent and head back home to our creature comforts. It was super disappointing that we had to head home, but we all agreed that it was super fun to make dinner outside and enjoy a warm meal around a picnic table in the middle of the woods by a stream. We were three girls and a dog who were camping in an unfamiliar (to two of us) location. Also, we drove into the campsite while it was already dark and we had ZERO idea about our surroundings. We headed home and then headed back to the campsite the next day to scope it out and face our fears. It was great to see the campsite during daylight and we all agreed that entering the park after dark + Koya going crazy + three girls alone in the woods = recipe for fear. We definitely want to go camping again and have camped in these awesome rolling huts, but we're saving tent camping for another summer. And I think I've found the perfect company to help us out with our camping experience. I'm thinking that we can bring our whole family and have Shelter Co. help us out. I foresee a few tents perched in the wilderness...what do you think? Here are some pics from their site and blog. How much fun would this be? I can hardly wait to talk to my family about it and book our adventure! Enjoy! :-) xoxo
 |
| Here's the inside of a tent. |
 |
For an additional charge, they'll throw in some extra gear...a cozy Pendleton blanket (see below!), a flashlight, and all the fixings for s'mores. |
 |
| An alternative to an on-the-ground tent...this totally reminds me of camping with the Girl Scouts...too much fun! |
You can uphold the golden rule of camping and arrive at your campsite during the daylight...
And hopefully, you'll arrive to see your tent (or tents!) all set up!
Then you can unpack your belongings and settle in to an exciting game of Scrabble...thanking Shelter Co. for hooking you up with the board game while you play!
 |
| Yay for playing Scrabble on the dock by the lake! |
Then it's time for some burritos for dinner and then s'mores by the fire...
...and then you're all set to do some star-gazing...
...and then off to bed. How fun would it be to crawl right into this awesome tent?!
You'll sleep as snug as a bug in a rug and you'll have the sweetest dreams.
And then you'll wake up to a cool and misty morning...
You can enjoy some coffee...
And marvel at the galloping horses as you sip your hot beverage...
All the while remembering this fine quote:
I hope you'll check out all that Shelter Co. has to offer! You most certainly will not be disappointed and I can guarantee that you'll be checking your schedule and planning your next camping trip as soon as you explore their site! Much love to you and your families :-).
xoxo
Tuesday, December 11, 2012
Double Chocolate Fudge Cookies


You'll need a total of five ingredients to make these fudge cookies. Here's the recipe...

1 box of Duncan Hines Dark Chocolate Fudge Cake Mix
1/2 cup oil
2 tablespoons water
2 eggs
1 cup chocolate chips (I used Hershey's Special Dark chips)
Directions:
Place cake mix, oil, water and eggs in a medium sized bowl. Mix all ingredients until thoroughly combined. Add chocolate chips and stir. Drop by rounded tablespoons onto a cookie sheet. Bake at 375 degrees for 7 minutes, or until top of cookies have lost their glossy shine and appear to be cooked. Do not overbake! Let cool on cookie tray for 2 minutes, then transfer to a cooling rack and sprinkle with powdered sugar, if desired.
My mom created this recipe back in 2005 and we've been making it quite frequently for holidays, parties, and get-togethers. Sometimes, we'll even add a half-cup of chopped walnuts to the mix if the recipient of these cookies is a nut lover. I hope you enjoy this recipe. Happy baking! :-) xoxo
Friday, December 7, 2012
Boot Love
Lately, I've been having a major crush on Frye boots. They're absolutely beautiful and I love them so much. There's only one problem...they're super expensive. Maybe one day, when I have a little bit more spending money, I'll splurge on a pair of these fine boots. But, until then, a cheaper alternative will have to suffice. Here's the original...
 |
| Source |
And here's the alternative choice by Aldo...
 |
| Source |
What do you think? I know the colors are a little different, but the basic style is the same. Oh man...the Frye boots are incredible. I currently have a pair of Via Spiga riding boots that I scored right after Christmas two years ago for a ridiculously cheap price. They're $300+ dollar boots and I can't even tell you how cheap they ended up being. Let's just say, the Big Man Upstairs was definitely helping me out that day (and every day!). Here they are...
 |
| Source |
I absolutely adore these boots and they're so well made. The leather still looks brand new and polished and I haven't even buffed them! They've lasted me almost two years and I've basically worn them to the ground. I can't even tell you how many miles I've put on these. My guess would have to be in the hundreds. No lie. The soles are wearing down and I might have to get them re-soled, but I'm hoping to add another pair of boots to my wardrobe. We shall see. I just don't want to go the Target route and end up with a pair of cheap-looking boots. No offense, Target, but these look kind of cheap! Call me a snob, but I can spot a pair of knock-off leather boots from a mile away.
Please indulge me one last time before I leave you...how beautiful are these boots? I mean, seriously, they're gorgeous! Is it appropriate to have an awesome pair of $300+ dollar boots and then dress in rags? Well, that might very well be my situation in the very minuscule chance that I end up purchasing these beauties. In my mind, I'm not really fancying that image of myself. Oh well, a girl can dream....
 |
| Source |
xoxo
Stress-free bus stop!
 |
| Source |
 |
| Source |
Tuesday, December 4, 2012
The Fetching Mrs. Hewitt's Molasses Crinkles
 |
| Source |
Apparently, Hugh Hewitt always refers to his wife as the "Fetching Mrs. Hewitt" and never by her real name. These are her cookies and apparently they're awesome. I saw this recipe and nearly gasped at the inclusion of Crisco, but I knew that the basic elements included in the cookie dough would make for a very tasty treat. Eager to make this version of the famous molasses crinkles a little more figure-friendly, I opted to use "I Can't Believe It's Not Butter," whole-wheat flour, and Splenda brown sugar blend for baking. These cookies are by no means healthful, but they certainly do have fewer calories and fat than the Fetching Mrs. Hewitt's version. My family loved them and I'm sure yours will, too. I hope you'll make these soon. Enjoy! :-) xoxo
Molasses Crinkles
adapted from the Fetching Mrs. Hewitt's Molasses Crinkles Recipe
3/4 cup of "I Can't Believe It's Not Butter"
1/2 cup Splenda Brown Sugar Blend for Baking
1/2 cup brown sugar
1 egg
1/4 cup molasses
1 and 1/4 cup whole-wheat flour
1 cup white flour
2 teaspoons baking soda
1/4 teaspoon salt
1 teaspoon cinnamon
1/2 teaspoon cloves
1 teaspoon ginger
Instructions:
Cream faux butter, sugars, egg and molasses in a medium-size bowl until fluffy. Combine dry ingredients in a small bowl and whisk. Add dry ingredients to wet ingredients and stir until just combined. Refrigerate dough for one hour. While dough is chilling, preheat oven to 375 degrees. Using a medium-size cookie scoop, scoop dough onto lined baking sheet. Roll dough into balls and dip top side of balls into sugar. Place sugar-coated balls on baking sheet and bake for 12 minutes. Cool for 10 minutes on cooling rack and then serve. This recipe makes 36 crinkles.
 |
| The dough is stiff after chilling for an hour. |
 |
| After rolling dough into balls, they're ready to be dipped in sugar! |
 |
| They look so pretty all sugar-coated! |
 |
| Finished product! Yummers! |
I hope you'll try this delicious and super-easy to make molasses crinkle recipe. I promise that it will be perfect for the holidays!
xoxo
Thursday, November 29, 2012
Greetings from the West Coast!
 |
| The view from my room! |
Lucky for me, I no longer feel queasy during flights (fingers crossed that my stomach continues to tolerate flying!) and I'm able to stomach apples and carrots and the occasional luna bar. With all of this said, I was starving by the time I landed in Texas, and I didn't want to eat anything dense or heavy because I didn't want to upset my sensitive stomach! Alas, frozen yogurt was the only thing that would fit the bill. After walking around and scoping out all of my options in several terminals (there was Häagen-Dazs, Freshens, Red Mango and Smoothie King to name a few) I finally decided to go with Red Mango. I had never had this frozen yogurt before and it was absolutely delicious! I sampled the original (way too tart!) and the vanilla bean (perfect!). I ordered the vanilla bean with blackberries and it was the perfect traveling treat! It was slightly sweet and very frosty, which is exactly how I like my frozen yogurt. I can't stand when frozen yogurt is too creamy, because then I just feel like I'm eating custard, when I really just want frozen yogurt! So, the entire point of that story was that you should try Red Mango vanilla bean ASAP. It's so good!
 |
| Use Yelp to help you find the nearest Red Mango...it's so good! |
I arrived at my destination and settled into my hotel room overlooking the beautiful pool and ocean. I was starving (it was 12am east coast time!) and I had been traveling all day, so I ordered room service. I've NEVER done that before and it felt so indulgent, but I was starving and I either had to go to bed immediately or I could have dinner and then have a few hours to enjoy my evening. I clearly chose the latter. And oh my goodness. It was one of the best meals I've ever eaten! It was a mango avocado salad with a chili vinaigrette and grilled salmon. They served me an enormous portion of grilled salmon and I barely ate half of the filet. It was SO good, though! I have to remember the combinations of those flavors...they were incredible!
 |
| Oh room service, you were so tasty... |
This morning, I woke up and headed to my meeting, ate some trail mix, and then headed to the gym and I just had dinner and now I'm blogging. It's been super fun to be away for a day and I can't believe I head back east tomorrow. I will have spent two days traveling and one day at a conference! It seems a little crazy, but I was up for the craziness!
 |
| My afternoon snack... |
 |
| The pool and the pacific ocean in the background! |
Happy Friday, friends!
xoxo
Wednesday, November 28, 2012
Hola desde el aeropuerto!
Hola! I'm blogging right now from my phone (my first time!) as I'm sitting at my gate getting ready to board my flight to a warm, sunny place! I'm heading to a sunny climate, not to visit family, but for a work trip. I'll be at a conference for the next few days. I absolutely love to explore new places and I'm sure that I'll post an update about my adventures when I return! Have a wonderful rest of your week! I'm going to go hop on my flight now! :-) xoxo
P.S. They're playing Christmas music in the airport! I'm in heaven :-). And I was able to find a cup of my favorite coffee...La Colombe is the BEST! So bold, yet smooth and flavorful. Success!


P.S. They're playing Christmas music in the airport! I'm in heaven :-). And I was able to find a cup of my favorite coffee...La Colombe is the BEST! So bold, yet smooth and flavorful. Success!
Tuesday, November 27, 2012
Happy Thanksgiving!
 |
| Thanksgiving place-cards that I made for our guests! |
I'll start by sharing the history of this delectable Apple-Sour Cream Crumb Pie that I made for my family. According to the Martha Stewart Living Magazine, this is the original Bookbinder's 1865 pie recipe. It's slightly more time-consuming than your average pie, but it is well worth-it! It is dense and a simple sliver is more than enough to satisfy a pie craving. We hosted more than twenty people for Thanksgiving this year, and our guests were literally raving about this pie! This is by no means a reflection of my baking skills; this is purely a reflection of this delicious pie! You must try this recipe for an upcoming holiday party. I promise that you won't be disappointed!
Apple-Sour Cream Crumb Pie
Martha Stewart Living, November 2012
For the pie dough:
1cup + 2/3cup all-purpose flour
2/4 teaspoon kosher salt
3/4 teaspoon granulated sugar
1 stick + 3 tablespoons cold, unsalted butter, cut into small pieces
1/3 cup ice water
For the crumb topping:
1/2 cup packed dark brown sugar
1/2 cup granulated sugar
1/2 cup all-purpose flour
1 teaspoon ground cinnamon
1/4 teaspoon kosher salt
1 stick (8 tablespoons) cold, unsalted butter, cut into small pieces
1 cup walnuts, coarsely chopped
For the filling:
1 cup granulated sugar
1/2 cup all-purpose flour
1 teaspoon ground cinnamon
Pinch of kosher salt
16 ounces sour cream (I used light sour cream and it was still rich and delicious!)
2 eggs, room temperature, lightly beaten
2 teaspoons pure vanilla extract
6 Gold Delicious apples, peeled, cored, and sliced into 1/4 inch wedges
Directions:
1. Make the pie dough: Combine flour, salt and sugar in a food processor and pulse to blend. Add butter, pulsing until pea-size clumps form. With food processor running add ice water, tablespoon by tablespoon, until mixture just comes together. Shape dough into disk, wrap in plastic wrap, and refrigerate until firm, about 45 minutes.
2. Roll dough on a lightly floured surface into a 15 inch round (1/4 inch thick). Fit dough into a 10-inch pie plate and cut excess dough to fit the plate. Crimp dough edges, or use your fingers to create a scalloped edge. Refrigerate until firm, about 1 hour.
3. Make the crumb topping: Whisk sugars, flour, cinnamon and salt together in a medium-size bowl. Add butter and combine with a pastry cutter. Stir in walnuts and form topping into large clumps with your hands. Refrigerate topping until ready to use.
4. Preheat oven to 450 degrees with 2 racks in the lower third portion of the oven.
5. Make the filling: Whisk sugar, flour, cinnamon and salt together in a large bowl. Stir in sour cream, eggs and vanilla until thoroughly combined. Add apples, tossing to coat. Pour apple mixture into refrigerated pie crust.
6. Place an empty rimmed baking sheet (be sure to line it with aluminum foil for easy clean-up!) on the lowest rack in the oven to catch any drips and then bake pie for 10 minutes. Reduce oven temperature to 350 degrees and bake for 45 minutes, until apples are golden brown, juices are bubbling, and the crust is golden brown.
7. Remove topping from the refrigerator and crumble over hot filling. I took the pie out of the oven for a minute or two for this step. Bake until topping is browned and set, apples are tender, and the bottom crust is thoroughly baked, about 50 minutes.
8. Remove pie from oven and let it cool completely on a wire rack, 3 to 4 hours.
9. Slice and serve. Enjoy!
 |
This pie was dense, delicious, and delectable!
|
The second pie that I made for this wonderful Thanksgiving holiday was a maple bourbon pecan pie. I usually just use the recipe on the back of the Karo Corn Syrup container, which is delicious and sugary and chock full of fat and sugar, but this year, I decided that I wanted to lighten things up a bit and I began searching for a healthier pecan pie alternative. In the past, I have found some cooking light recipes to be hit-or-miss...mostly hits, but occasional misses, so I really wasn't sure how this pie would turn out. But, I was reassured by the overwhelmingly positive reviews of the recipe and I decided to give this a try. I knew that with the additions of maple syrup and bourbon, the pie would have lots of flavor. And I knew that the flavors could all work well together. I just wasn't sure if it would live up to the pecan pie recipe on the back of the corn syrup container! Alas, I decided that I was up for the challenge! It turned out to be delicious and I definitely want to make this pie again! I used a store-bought pie dough and this pie literally took me less than ten minutes of hands-on time to make. It was a welcome reprieve from the labor intensive apple-sour cream crumb pie! Without further ado...here's the lightened up pecan pie recipe! Enjoy! :-)
Cooking Light, November 2011
1/2 package (14.1-ounce) package refrigerated pie dough (I used Pillsbury)
Cooking spray
3/4 cup pecan halves (I used a few more than this)
1/4 cup finely chopped pecans
1/2 cup maple syrup (use good quality, high-grade maple syrup)
1/2 cup dark corn syrup
3 tablespoons dark brown sugar
2 tablespoons butter, melted
2 tablespoons bourbon
1 teaspoon vanilla extract
1/4 teaspoon kosher salt
2 large eggs, lightly beaten
2 large egg whites, lightly beaten
Directions:
1. Preheat oven to 350 degrees.
2. Roll dough into a 12-inch circle. Fit dough into a 9-inch pie plate coated with cooking spray. Flute the edges of the dough and chill in the freezer for 15 minutes.
3. Combine chopped pecans and remaining ingredients in a large bowl, stirring well to combine. Pour filling into prepared pie crust. Layer 3/4 cups + of pecan halves on top of the pie and arrange in a pretty pattern. Bake at 350 degrees for 38 minutes, until center of pie is almost set. Cool on wire rack for one hour.
4. Slice, serve, and enjoy!
 |
| This was so tasty and so easy to make! |
I hope you enjoy making these delicious pies! Happy Holidays!
xoxo
Subscribe to:
Posts (Atom)